Tag: reaction time

Action Target LETC 2012 a Great Success

Action Target’s annual Law Enforcement Training Camp ended Friday as instructors and trainees parted ways after another year of advanced law enforcement training.

This year’s LETC was attended by 147 law enforcement officers and firearms instructors from across the country and the world. More than 20 states were represented with officers from California and Oregon to Florida and New York. While LETC is traditionally a domestic law enforcement camp, as its fame has spread throughout the world, we’ve increasingly received requests to attend from foreign law enforcement agencies. As in years past, we were pleased to welcome officers from Canada, but this year was especially unique with the addition of participants from Brazil and China.

On Monday, Sept. 10, officers arrived at Action Target’s headquarters to sign in and pick up their gear which included personalized water bottles and dog tags. They were also able to tour the facilities where all of Action Target’s products are designed, engineered, and manufactured.

Classes started Tuesday morning at the Utah County Sheriff’s Office Thistle Firing Range. New to this year’s training classes were George Harris’ Combat Skill Drills for Firearms Instructors, Bob Schneider’s Shoot House Training, James Washington’s Training for the Fight with the Pistol, and Brian Hoffner’s Extreme Close Quarter Battle Tactics with Hands, Knife, and Pistol. A total of 12 instructors participated from a variety of organizations including Spartan Tactical Training Group, Safariland Shooting School, Hoffners Training Academy, Glock Training Division, Police Training Division, JDS Tactical, and Fusion Tactical and Combatives.

On the first day of class, the Utah County Sheriff’s Office explosives department set up a demonstration to kick things off with a bang. A charge was placed on the hill next to the uppermost firing range and was connected to several additional charges that ran down the hill and along the periphery of the range. To demonstrate the delay mechanism’s non-electric shock tube technology, a sniper shot the main charge from atop a storage container setting off a series of explosions down the hill. The explosives department also demonstrated several forced entry explosive mechanisms as well as a unique steel puncturing technology consisting of a coil of explosives wrapped around a beer can.

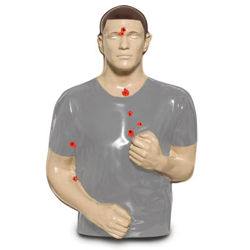
Wednesday night, more than 50 officers at the camp put their skills to the test in the Dirty Harry shooting competition as they vied for free tuition at next year’s LETC. Participants were required to shoot 21 colored knock down targets from three corresponding colored boxes. Shooting the wrong color or shooting one of the six no-shoot targets meant instant disqualification. Law enforcement officers from Utah crushed the competition taking first, second, and third places. Officer Rob Wilkenson of the Utah Highway Patrol took the grand prize winning by more than five seconds with a time of 23:19.

A banquet was held Thursday evening to honor the dedication and sacrifices of law enforcement officers throughout the nation and the world. McKenzie Matthews began the banquet by singing the “Star Spangled Banner” and was followed by Provo Mayor John Curtis who gave the welcome speech. The night’s program centered around the memory of the brave men and women who lost their lives in the protection of our freedoms. The Payson High School Pipe Band performed ‘Amazing Grace’ as photos of law enforcement officers who died by gunfire this year were shown on a projector screen during a special memorial for fallen officers. A memorial was also held for law enforcement who lost their lives in the 9/11 attack. Deputy Chief Steven J. Silks of the New York Police Department, a participant in this year’s camp, spoke of his experiences that day and shared a firsthand account of the bravery exhibited by the brave men and women he served with during that catastrophe.

The camp ended Friday afternoon with a few final classes before attendees began their long journeys home to locations across the nation and the world.

We at Action Target were honored to have so many exceptional officers at this year’s camp, and we hope that each one took home something new that they can share with the men and women they serve with. Superior law enforcement training has always been one of our corporate missions, but we couldn’t make that happen without the continued assistance of our instructors and the participation of the world’s finest. To everyone that attended, instructed, or helped, we thank you and hope you enjoyed your time with us.

Additional Images

Accuracy After Injury: How Will You React in a Firefight When Suffering from the Symptoms of Shock?

By: Brian C. Smith

Editor’s Note: The views in this article are the author’s own and don’t necessarily represent those of Action Target, Inc.

Approximately 16 years ago, I had a conversation with an old “salty” veteran police officer over lunch. He was sent by his police agency to attend a firearms class that I was teaching as a way of punishment for his actions that were defined as unsafe firearms tactics by his police agency’s administration. The class I was teaching was titled “Survival Shooting Tactics for Armed Confrontations,” which was a one-day, eight-hour course at the time. The course has undergone many revisions and updates since then. In our conversation, I soon realized that this officer has probably forgotten more than I will ever know or experience in my police career. I found myself taking mental notes while conversing about details he had mentioned on how he survived in a few of his encounters with close call situations.

The officer then hit me with a question, “How would being injured in a fire fight encounter affect your firearm accuracy?” Being young and cocky, my response was, “That should not matter, sight alignment and sight picture would be the same. I still should be able to hit the threat no matter what.” The old salty police officer looked at me as he leaned back in his chair and just smiled. After a few moments of both of us just staring at each other, the old guy said, “I will give you credit for being a good firearms instructor, but I can see that there are some things you have yet to experience in this life as a police officer.” After that brief lunch, it was as if I had just been educated by one of the three wise men.

I then researched how the human body is affected by blunt trauma and what physical symptoms that person will experience as well as how these symptoms would affect a shooter’s accuracy in a fire fight. In my research, I discovered the medical condition that may apply is referred to as “neurogenic shock.” This is a condition where the human body suffers a minor injury or traumatic experience. In the condition of neurogenic shock, the most common symptoms include:

  • A fast, weak pulse
  • Low blood pressure
  • Feeling faint, weak, or nauseous
  • Dizziness
  • Cold, clammy skin
  • Rapid, shallow breathing
  • Blue lips

The symptoms start developing approximately 90 seconds after the incident occurs. This time span can vary due to age, physical condition, or pre-existing health problems.

I have personally suffered from this condition many times when I have sustained a minor injury while playing sports or engaging in other physical activities. I have witnessed the common treatments of this condition as having the person lie on their back with feet slightly elevated to raise their blood pressure, keep them warm by covering the person’s torso with a blanket or garment, and administer fluid. A person can develop this condition by suffering a dislocated finger, sprained ankle, brachial stun to the torso, or the unthinkable – a gunshot wound.

From this research, I developed a shooting drill that we have included in the “Injured Officer” segment of our firearms training curriculum named as the “Equilibrium Drill.” This helps our training staff to illustrate two different concepts on how your condition may affect your firearms accuracy.

1. Physical reactions that may compromise your firearm proficiency due to an injury

2. Diminished firearms accuracy due to inebriation

Also, while serving in my former position as Director of Training with the Chicago Heights Police Department, one of my duties was to orientate and prepare the new recruits graduating from the academy for their new assignments. This included an orientation class that consisted of about 16-18 hours (two consecutive days) of training that was to be completed just prior to being assigned to an FTO (Field Training Officer). This Pre-Field Training Officer’s course curriculum consisted of topics such as handcuffing, expandable baton, OC pepper spray, and an eight hour handgun course on survival tactics at the range. My prior experience and perils as a young officer qualified me when I recited the common cliché, “Been there and done that.” I have an understanding of young male police officers, full of testosterone, and how they are capable of making many mistakes in the infant stages of their careers. We found it necessary to always discuss with the recruits the topic of off-duty encounters, which is included among a variety of topics on consuming alcoholic beverages and developing “beer muscles” while patronizing a liquor-serving establishment. Therefore, this shooting exercise also emphasized the outcome if a police officer were to be engaged in a firefight while intoxicated.

The “Equilibrium Drill”

(Simulating shooter intoxication or neurogenic shock as a result of an injury)

Target: 3 metal pepper popper plates or 3 large round balloons – I suggest you use 12-16 inch diameter balloons.

Distance: 40 feet (from the target to the established firing line)

Ammo: 5 rounds, no magazine exchange or reloads required

Weapon: Pistol or revolver

Shooting Position: Kneeling, sitting, or prone

Exercise

A. Shooter loads and makes ready, then places the weapon on the ground with muzzle pointed double down range.

B. Shooter steps back approximately 15 feet away from the weapon.

C. Shooter stands in the center circle of 2-3 range officers with his arms folded across his chest.

D. The range officers spin the shooter around in a circle for approximately one minute to create the dizziness effect.

E. After the one minute, the range officer will give the command “Go,” at which point the spinning will stop and the shooter must attempt to get to his weapon while dizzy and dazed.

F. Upon reaching his weapon, the shooter will take a shooting position on his knees or prone and engage the targets in a rapid fire manner.

Results

It is rare that a shooter in the class has been able to hit all his targets while dizzy, although there have been some exceptions. This exercise involves a great deal of humor, along with a certain reality among the class in witnessing each other’s reactions while dizzy.

This exercise has proven to be a positive illustration for the recruits, teaching them the risks of carrying a firearm while consuming alcoholic beverages in a social setting with other officers or their families. It also allows them to experience the symptoms of suffering a bullet wound so they can be aware of how it will affect their accuracy. Once recruits are aware, they can learn how combat those symptoms and regain a measure of accuracy when shooting. I encourage officers to assume a shooting position low to the ground such as kneeling, sitting, or prone. Experience has revealed that the longer you attempt to stand while suffering from shock the more likely you are to faint.

I also encourage recruits and veteran officers to remain in the fight until the threat is down or stopped. Fainting during the fight is not an option. The officer is expected to give 100% to the end and hope for a positive outcome.

About the Author

Captain Brian C. Smith is a 28-year veteran of the Chicago Heights Police Department and is currently serving as Commander of Training and Special Operations. He has 21 instructor certifications and four armorer certifications. Captain Smith has an associate degree in law enforcement from Thornton Community College and graduated from tile 184th session of the FBI National Academy. He is member of the Illinois Tactical Officers Association, National Tactical Officer Association, ASLET, IALEF, and the American Federation of Police and Concerned Citizens, where he serves as Chairman of the Survival Tactics Committee.

10 Ways to Prevent Wildfires While Target Shooting

More than 20 wildfires have been started by target shooting this year in Utah alone with dozens more started in Idaho, New Mexico, Arizona, Nevada, and Washington. Many of those fires could have been prevented or stopped had the shooters been prepared. Here is a list of 10 things shooters can do to prevent wildfires while target shooting:

  1. Bring a bucket of water – This may seem obvious, but often, shooters fail to bring enough water to put a fire out. A five gallon bucket of water at the ready while shooting could prevent a disaster if a fire does start. We recommend placing the bucket near the targets you’ll be shooting. That way, if a fire starts, you won’t have to waste precious time carrying a heavy bucket all the way to where your targets are set up.
  2. Shoot on quality steel targets – Action Target’s steel targets are designed to minimize risks to both the shooter and the environment. The flat target surface with no exposed clamps or brackets allows for a predictable bullet splatter, and the 30 degree angle of the target plate forces bullet fragments down toward the feet of the target. Uneven shooting surfaces produce unpredictable splatter and ricochet which increases the surface area exposed to sparks and hot bullet fragments.
  3. Place your targets on dirt or gravel – Make sure your target is placed on a level, unvegetated surface of dirt or small grained gravel. Placing a target in tall grass increases the risk of fire.
  4. Don’t shoot trash – Trash like old couches and TVs can often be found on public land but are dangerous fire hazards when shot. Because there is no hard surface to cause the bullet to break up, hot rounds can build up inside and create enough heat to cause a fire.
  5. Don’t shoot with steel core ammo – Ammo that contains a steel core will spark when it hits a rock or a steel target. To avoid any chance of sparking, do not use steel ammunition and avoid shooting in rocky areas.
  6. Bring a shovel and an old blanket – Use the shovel to dig a trench around your targets before shooting to ensure that any fire caused by sparks can be easily contained. Place the blanket near the targets you’ll be shooting so it’s easily available if needed. A blanket is one of the best ways to smother a fire and can be even more effective than water.
  7. Never shoot exploding targets – Binary exploding targets made of ammonium nitrate and aluminum powder (commonly known as Tannerite when combined) are popular among recreational shooters, but can be highly destructive. Never use exploding targets in flammable areas. Exploding targets (listed as “other pyrotechnic devices”) are outlawed on public lands by the Bureau of Land Management’s Fire Prevention Order.
  8. Don’t use incendiary or tracer ammo – Incendiary and tracer ammo are also outlawed on public lands by the BLM’s Fire Prevention Order. Any ammo that “burns” can easily ignite grass and brush and should not be used in flammable areas.
  9. Don’t smoke – Even if you’re following all safety precautions in regard to shooting, you can still easily start a wildfire by smoking. If you’re shooting in a dry location, make sure that all cigarette butts are properly extinguished or avoid smoking at all.
  10. Park your vehicle away from dry grass – Several fires this year have been started by vehicles parked over grass. Many people don’t think about it, but the hot undercarriage of a car or truck can easily create enough heat to ignite dry grass.

About Action Target, Inc.

Action Target, Inc. is a privately owned business headquartered in Provo, Utah. As a world leader in shooting range technology with more than 4,000 products and 40 patents for the systems it designs and manufacturers, Action Target has installed thousands of shooting ranges across the United States and in 25 other countries around the world. Action Target also designs systems and conducts firearms training for law enforcement and various military divisions. For more information on Action Target, visit www.ActionTarget.com. To learn more about Action Target products or to purchase items online, visit www.ActionTarget.com/store .

Team Building Concepts: Training Exercises That Will Bring Your Team Together

BY SGT. BRIAN C. SMITH

Editor’s Note: This article was originally published in S.W.A.T. magazine in September 1999. The views in this article are the author’s own and don’t necessarily represent those of Action Target, Inc.

Over the years, I have trained many police and private security officers in tactical-team operations. I find that the most difficult phase of the training class is the beginning, where I stress teamwork to a group of individuals who are reluctant to cooperate during the first phase of training. This can be due to a lack of familiarity with the other participants in the class, a lack of experience with team concepts, or individual ego problems.

When the topic of teamwork comes up, my first thought, like that of most other people, is of athletic teams, such as basketball and football. My conceptualization of exactly what a team is became somewhat more enlightened when, recently, I watched a team of fire department paramedics work frantically to treat a gunshot victim on a police call that I responded to. The medical jargon, coordination, and smooth choreography of their actions while using their emergency equipment, were a strong indication that they had practiced this scenario before. This incident prompted me to inquire about how often firefighters from several different fire departments trained together to prepare for a crisis. To my surprise, they trained as a team more often than the patrol division of the police department in my area. At the police agency where I’m employed, a five-minute roll call is not sufficient time to discuss topics of survival or practice a tactical scenario that the officer might encounter during his tour.

I also recently attended a circus with my two-year old daughter and watched the high-wire event, where an acrobatic team of four balanced themselves on one bicycle and rode on a tightrope from one platform to another without a mishap. This feat could not have been accomplished without many hours of practicing together as a team, bringing all the principles of teamwork into play. These principles are referred to as The Three C’s: Communication, Coordination, and Cooperation.

Our team’s philosophy of team-building, attempts to phase out the individual mind-set and bring all the members of the team together as one to complete a difficult task. The team members must have confidence that each member will do his part in any given assignment. Each member must know his individual responsibility and what is expected of him in order to perform the task successfully.

Communication is extremely important; a team, organization, or group cannot operate efficiently without communication. This can take the form of verbal or written communication, hand signals, or facial expressions, and must be comprehended by everyone involved to be effective. Coordination follows when each person is assigned a responsibility and performs when expected to. Cooperation is the final step in this team-concept triad. Here, everyone involved is willing to perform and participate.

Discipline is another concept that helps develop team camaraderie during the introduction of the class. A series of guidelines is presented to the group, along with the degree of discipline the group will endure as a whole. In our tactical-team training class, violation of any stipulation in the guidelines would result in a maximum of five push-ups, depending on the severity of the violation.

It’s inevitable that, at some point, someone in the group will commit an infraction for any number of reasons, and, as the group is subject to serving its punishment, one can see the camaraderie developing and the group coming together as a team.

Provided in this article is a low-cost program of team-building events that has proved effective and beneficial in our tactical-team training. It has also been helpful for other types of groups that aim to create a team mind-set among their members, and can, likewise, do the same for your team. The objective of these exercises is to enhance planning, coordination, and communication. This will also create confidence and trust among team members and is what makes the difference between a mere group of individuals and a real team.

LIVE-WIRE EVENT

  • Details: Must get the entire team inside the three-sided structure without touching the ropes or poles. Once inside the structure, the entire team must exit again without touching the structure.
  • Penalty: If any team member touches any part of the structure, the team must start the entire exercise from the beginning.
  • Equipment: Rope, dowel rods, and tent stakes. Structure is in a triangular formation.

CONFIDENCE FALL

  • Details: A member stands on a ladder or platform at an estimated height of four feet. The remaining members must form a human net to catch the person falling backward. Note: the faller must put his hands in his trouser pickets, as a safety precaution, to prevent members of the human net from being struck in the face during the fall. The faller must alert the human net when he is ready to start so that they are prepared to catch him. The participants should be advised not to make jokes about not catching the faller due to the anxiety this creates. Such negative comments could prove to be counterproductive.
  • Penalty: If the faller bends at the waist as he falls, this reflects a lack of confidence and trust in the team, they must repeat the exercise.
  • Equipment: Stepladder or stationary platform.

BLINDMAN’S SOCCER

  • Details: The group is divided into two teams, which are distinguished by colored bandannas; these are also used as blindfolds. One member is selected from each of the two teams to post as the blindfolded player, and one member from the same team is designated to give voice commands for the player to follow on where to kick the ball.
  • Penalty: Player must remain blindfolded while the exercise is in session or forfeits the game.
  • Equipment: Soccer ball or equivalent and bandannas of two different colors to blindfold the players.

LOG MOVEMENT

  • Details: With a regimented effort, the team must move an eight-foot, 4″x 4″ wood beam with 16 feet of heavy rope that is tied at both ends of the beam. This exercise cannot be completed until the team comes together as one, which sometimes takes a while. You will witness frustration at the start of this event. The maximum number of members on a beam is ten; the minimum is four. Each member faces the same direction with the same foot resting on the beam, and the rope must rest over the same shoulder. The members must move the beam a distance of 75 feet without their hands, then, on command of the instructor, switch positions, facing the opposite direction with the opposite foot on the beam and the rope resting on the opposite shoulder. The team then proceeds back to the starting point.
  • Penalty: Should any member’s foot come off the beam or the rope come off the shoulder, the team must return to the starting point.
  • Equipment: One eight-foot 4″ x 4″ wood beam per ten people and one 16 foot rope per team.

BALANCE-BEAM SHUFFLE

  • Details: Six to eight members line up randomly on a eight-foot, 6″x 6″ wood beam or railroad tie. Each person faces in the opposite direction of the person beside him. Without verbal communication or stepping off the beam, the members are to determine who’s the oldest and youngest, then maneuver their positions so that the oldest person is at a designated end of the beam, with the younger members following in sequence to the opposite end.
  • Penalty: If any member’s foot touches the ground or if he makes any verbal sounds, all team members must stop and return to their original positions.
  • Equipment: One eight-foot, 6″x 6″ wood beam or a railroad tie per six to eight team members.

BLINDMAN’S FORMATION LINE

  • Details: The team is instructed to line up and sound off in numerical order. An area, such as a wall or fences, is designated as the starting point, where the team is to line up in sequence perpendicular to the starting point in the same numerical order. The members are blindfolded and spread out, then given the command to start. Without verbal communication, the members are to find the starting point and then line up in order. The first attempt will appear chaotic, but if the team is allowed to orchestrate a plan just prior to the second attempt, this exercise will appear a lot less complicated.
  • Penalty: If any verbal comments are made or if anyone removes his blindfold, the exercise is stopped and resumed from the beginning.
  • Equipment: Cloth bandannas to use as blindfolds.

BLINDMAN’S CONFIDENCE RUN

  • Details: One member is blindfolded and positioned to run toward a fixed structure (such as a wall or fence) from a distance of approximately 50 feet. The remaining team members are to line up in front of the structure to catch the runner and prevent the runner from colliding with the structure. No verbal sounds are to be made by the team so that the runner isn’t able to judge distance when approaching the structure.
  • Penalty: If the runner slows down prior to approaching the structure, this indicates a lack of trust or confidence in the team, and the exercise must be repeated.
  • Equipment: One bandanna to blindfold the runner.

About the Author

Captain Brian C. Smith is a 28-year veteran of the Chicago Heights Police Department and is currently serving as Commander of Training and Special Operations. He has 21 instructor certifications and four armorer certifications. Captain Smith has an associate degree in law enforcement from Thornton Community College and graduated from tile 184th session of the FBI National Academy. He is member of the Illinois Tactical Officers Association, National Tactical Officer Association, ASLET, IALEF, and the American Federation of Police and Concerned Citizens, where he serves as Chairman of the Survival Tactics Committee.

—————-

LETC 2012

For over 20 years, Action Target has been holding the Law Enforcement Training Camp (LETC) to help law enforcement departments across the nation get the quality firearms training they need and deserve. This year’s LETC will be held September 10-14 in Utah County.

The registration form for LETC can be found at https://www.actiontarget.com/calendar under the “More Info” column for Sept. 10-14. Instructions on how to submit your registration can be found at the bottom of page.

Registration will be reserved for the first 160 applicants, so apply today!


Click to watch highlights from LETC 2011.

Action Target Reveals First Reactive Steel Target Under $50: The Spinning Jack

You asked for it, so we’re giving it to you: our first reactive steel target under $50. The Spinning Jack is the perfect target for recreational shooters and families, and at the super low price of $35, it’s affordable on almost any budget.

A great portable steel target for shooting with the whole family! The Spinning Jack combines the simplicity of a static target with the excitement of a reactive target and is guaranteed to provide hours of fun.

The Spinning Jack is a safe way to enjoy shooting with the family without having to go down range to reset or replace your target. With alternating circle and square plates, the jack spins in its stand when shot so there is always an exposed paddle to engage. Made of 1/4″ AR500 armor steel, the Spinning Jack can be shot with anything from .22 rimfire to .44 magnum.

The Spinning Jack comes in three pieces with no assembly needed. Using the provided foot step, pushing the frame into the ground is easy and doesn’t require the use of a hammer. Once in the ground, all that’s left to do is place the jack in the hole at the top of the stand and watch it spin with each hit.

Get your Spinning Jack now!

Action Target at the 2012 Bianchi Cup

Action Target recently completed one more year as the official target sponsor of the Midway USA & NRA Bianchi Cup. The National Action Pistol Championship, now in its 33rd year, was held in Columbia, MO, and featured many of the world’s top shooters competing for the prestigious cup. Action Target provided products and services again this year to ensure the range was in top operating condition.

“The Bianchi Cup is unique from other shooting competitions because it uses turning targets and other target systems a bit more advanced than you would normally see at a competition,” said David Mathis, Director of Marketing for Action Target. “Those systems are what we specialize in at Action Target, so working with the NRA to support this match is something we are proud to do each year.”

The Green Valley Rifle and Pistol Club (formerly the Chapman Academy) has hosted the Bianchi Cup every year since its inception and has used Action Target products and systems for nearly 20 years. This year, Action Target added new target clamps to speed up changing targets and provided maintenance for all of the range’s target systems. The Green Valley Rifle and Pistol Club also offered a practice range, separate from the main range, where competitors could arrive early to check their equipment and practice for the match. Action Target provided plate racks and paint for competitors to use as they warmed up on the practice range.

Founded in 1979 by law enforcement veteran and holster innovator John Bianchi, the Bianchi Cup began as a shooting competition designed to test law enforcement officers’ skill with a pistol. The competition challenged shooters’ speed and accuracy using barricades, alternative positions, and timed events. It did not take long for the match to gain popularity among the shooting community with many top shooters attending from all over the world.

The Midway USA & NRA Bianchi Cup features four different matches shooters can compete in: The Practical, The Barricade, The Moving Target, and The Falling Plate events. Shots are fired from 10 yards up to 50 yards with the shooters’ scores determined by their accuracy on each target. The shooters’ final scores are the sum of their scores for all four matches. This year 237 shooters competed for the national title with the Bianchi Cup going to Doug Koenig, who has won it a record 14 times.

In addition to being the official target sponsor, Action Target is also the sponsor for the women’s championship, won this year by Julie Golob for the third time.

Three of Action Target’s staff also participated by shooting in the competition. David Mathis, Mike Stilwell, and Chris Hart competed more for bragging rights around the office than to win a national title with Mathis coming out ahead.

Should I Shoot On Paper or Steel Targets?

There seems to be an ongoing industry-wide debate about which targets are best—paper or steel. While neither one will ever be crowned the ultimate victor, Action Target’s Steel Target Resource Guide gives meaningful insight to outline the strengths and weaknesses of each target type.

Paper

Action Target HoldShooting on paper is a great way to sight-in rifles and score trainings, and is great for qualifications held by law enforcement agencies. Paper allows a shooter to see where shots land, illustrating how tight groups are. The NRA and other leading organizations use a lot of paper targets precisely for this reason. Another benefit of paper targets is that they provide a bigger variety of shapes, sizes, pictures, and scenarios (there are even a lot of zombie targets out now to add an extra element of fun to training). Each organization has its own types of score zones, stages, and qualification targets, so the wide variety of paper targets allows for greater flexibility between events. Many competitions use paper targets because of this flexibility.

Steel

One of the greatest benefits of using steel targets is the instant feedback they provide. Shooters can usually see and hear when they’ve hit a steel target and this is something that cannot be done when using a paper target. Whether the range is training civilians or law enforcement officials, steel targets help shooters know whether their intended target was hit or not. Hearing and reacting to the sound of a shot hitting a target helps program muscle memory, which reinforces positive behavior. Up Close View of Static PackageJust like in all athletic training, the body subconsciously remembers how to repeat or orchestrate all the different variables required for a successful movement, or in this case, shot. The ability that steel targets offer in regards to instantaneous feedback can actually enhance training, speed, and accuracy. This is especially important for tactical shooting scenarios with movement, such as moving plates and targets. Having multiple senses invoked during this training process conditions the shooter to become a more powerful and effective shooter.

Another benefit of reactive steel targets is the pure entertainment factor. It may seem frivolous at first, but it can provide an enormous benefit to a training program. The fall, spin, bounce, and dodge of a target all lead to a fun and enjoyable experience for shooters of all skill levels. This will eventually lead to an increase in range use and therefore, an increase in profitability for the range.

So, should you shoot on paper or steel targets? In short, it depends on the purpose of the shooting exercise. As already discussed, if the purpose is for scoring, a paper target is best. However, if the shooter wants immediate feedback and would like to train on a more tactical level, steel targets are recommended. For more information on making the best decision, download Action Target’s Steel Resource Guide.

Action Target Produces Portable Target Course Book

Firearms instructors and administrators have an obligation to officers and to the public they serve, to do everything possible to ensure their firearms training and qualification programs are all they can be. However, many programs around the country struggle to provide realistic and quality training for their officers and there is often a lack of resources to help remedy such problems. That is why Action Target has developed a course book for their Portable Targets.

The specific purpose of the Portable Target Course Book is to “ensure trainees a program that is designed to develop trainings that are safe, test fundamental skills, increase and enhance movement, improve the target selection thought processes, and enhance overall tactical awareness.” Action Target’s Portable Targets have become an industry standard and leader and the course book allows for a better overall training experience.

Trainings must be expansive enough to test the trainees in as many ways as possible. Using the course book, trainings intentionally provide a more difficult setting than the typical experience might call for. In order to truly help an officer through training, the training must incorporate more movement, more rounds fired, greater difficulty of targets, multiple target acquisition, and more reloading situations. They must also include low-light shooting and one-handed operation of the gun to truly prepare an officer. Remember, the more difficult the training program is, the better prepared the officers will be to survive a lethal force encounter without injury to innocent parties.

The Portable Target Course Book is made available to anyone for any training purposes. People are welcome to use, copy, and modify the courses offered in the course book in order to help their trainings become top-notch. The courses are most effective when they are used as a foundation for more specialized exercises that will reflect individual training needs. After all, these courses should not be seen as an end, but as a beginning.

To download your free copy of the Action Target Portable Target Course Book, visit https://www.actiontarget.com/portable-targets and use the link at the bottom of the page in the “Related Pages” section.

The Head-Shot Cadence Drill

By Richard Mann

Editor’s Note: The views in this article are the author’s own and don’t necessarily represent those of Action Target, Inc.

Gunsite Instructor Il Ling New believes one of the best ways to train with a defensive handgun is to practice head shots at moderate to extended ranges; meaning as far out as 20 yards. At first glance this may seem a bit extreme but consider that if you can consistently and quickly get heads shots at these distances, center punching a troll at between three and five yards should be easy.

The most common way to practice head shots is to draw from the holster and fire a single shot at the head of a target. Action Target’s Steel Hostage Target works great for this because you can use either the square head of the silhouette or the flapper head that will swing from side to side when hit. This flapper target actually adds a new dimension to head shot training that is impossible to achieve just about any other way.

Regardless of the defensive handgun training that you conduct, training to only deliver one round is not tactically sound and does little to advance your skills, especially when working at varying distances. One question firearms instructors often get asked is, “How soon after my first shot should my next shot be?” In other words, students want to know what their shot cadence should be. The answer is, of course, as fast as you can get hits, and this will vary as your ability increases.

With the Action Target Steel Hostage Target you don’t need a shot timer or an instructor telling you you’re shooting too slowly. Since the flapper target swings from side to side based on energy imparted to it by the bullet, the further away the target is, the slower it will flop over to the other side. The time it takes the target to flop lets the shooter recover from recoil and reengage the target at a new location.

This is realistic because it’s doubtful a bad guy will stand still while you are shooting at him and the greater the distance to the target, the more time it will take you to recover and align your sights. This time is matched very well by the flapper target. If you are ready to shoot as soon as it reappears, you’re shooting fast enough and not too fast, if you get a hit.

Here is a simple drill you can use to practice head-shots at varying ranges while fine tuning your shot cadence:

  • Set Action Target Hostage Targets at 5, 15, and 20 yards
  • Start by practicing at each individual distance, engaging the flapper target only
  • After you are consistent at each range, engage all the flapper targets starting with the closest and moving to the furthest, with at least two shots each (more shots at each range are even better if your handgun has a higher capacity).
  • If you only have two Action Target Hostage Targets or limited ammo capacity, place one at 5 yards and the other at 20.

You don’t need a shot timer. Your goal is to engage each flapper target as soon as it reappears. Do this often and you’ll become at-one with your proper shot cadence at near and far ranges. This drill, coupled with the Action Target Steel Hostage Targets, offers a simple mechanical solution to a complex firearms training problem for shooters of all abilities.

To read more from Richard Mann check out his blog Empty Cases, www.empty-cases.com.

The Muzzle-Discipline Solution

By John Krupa III & John Farnam

At a recent Urban Rifle Course held at an outdoor range, a student with the muzzle of her AR (patrol rifle) elevated had a ND (negligent discharge), which put a single 5.56 x 45 bullet over the berm and off-property. The bullet in question subsequently impacted, at a high angle, a lake a half-mile downrange. No injury or property was damaged as a result, but several local fishermen reported the incident to the local sheriff’s office, and I heard about it shortly thereafter.

Berm heights vary widely from range to range. Most are 10 feet or higher. Even so, sending a bullet over the berm is still easily done, no matter the height. Some fancy ranges even have downrange, overhead “baffles” designed to keep bullets–inadvertently launched at a high angle–from leaving the range; however, even at these facilities, bullets occasionally seem to find a way off-property. Additional efforts to contain them invariably convert the “outdoor range” into an indoor range!

The better solution to this issue is muzzle-discipline.Action Target September Newsletter

“Muzzle-Down” is the by-word on all DTI (Defensive Training Institute) Ranges. All rifle, pistol, and shotgun handling is with the muzzle no higher than horizontal. Elevating muzzles past horizontal during administrative processes, and during reloading and stoppage-reduction, is commonly taught in some quarters, but it is wrong and dangerous!

In the incident described above, a rifle muzzle was inadvertently elevated during the loading process, as the student was relying on previous training. We corrected it, of course, but not before that single round departed range property.

When ND’s occur with the muzzle down and angled toward the berm, the bullet hits the ground between the shooter and the berm and can still subsequently jump over to the other side. However, these ricochets are typically low energy and far less dangerous than direct launches. “Muzzle-Up” is bad practice for other reasons too. Handling guns with the muzzle up is an invitation to a disarm, and rifle barrels angled upward will reliably betray an operator’s position and intentions, particularly when he/she is behind cover.

So, our students need to become accustomed to keeping all muzzles continually at a downward angle, coming up to horizontal only when aiming at a target. All administrative processes-loading, unloading, and performing a chamber-check can be (and must be) done with the operator facing in a relatively safe direction with the muzzle angled downward.

With escalating numbers of novice gun owners, preventing gun accidents is rapidly emerging as a critical priority. Gun-fear, trigger-locks, and the “empty-gun/never-ready” philosophy represent only a false and fraudulent myth. Genuine Operators, who carry and deal with loaded guns every day, need a legitimate and dependable gun-handling procedure that is adhered to without fail, and keeping muzzles down is an integral component.

About John Krupa III

John is a police officer with the Orland Hills Police Dept. and has over 20 years of experience in LE. He has previously served as a beat officer, rapid response officer, and firearms instructor with Chicago PD. He is a graduate firearms instructor from the Secret Service Academy, FBI, DEA, and FLETC. John is founder and president of Spartan Tactical Training Group, Director of Training for the DS Arms LE Training Division, and has previously presented at ASLET, GTOA, IALEFI, ILEETA, ISOA, LETC, MTOA, NTOA, and TTPOA training conferences. To learn more about John Krupa III or Spartan Tactical Training Group, click here.

About John Farnam

John has been a police officer since 1971, when he joined the City of Elroy Police Department as a patrolman. He is presently a fully commissioned deputy sheriff Training Officer for the Park County, Colorado Sheriff’s Office. John has written articles about defensive shooting and tactics in addition to several books. To learn more about John Farnam or Defensive Training Institute (DTI), click here.

* The views are the authors’ own and don’t necessarily represent those of Action Target, Inc.