


Written by Ben Kurata
In a previous article I discussed the advantages of training on reactive steel, the primary one being a dramatically shortened learning / performance improvement curve. Other advantages include cost effectiveness. Say WHAT? Isn’t steel expensive? Well, if you are your department’s Range Master or Chief Firearms Trainer, how much do you budget a year for paper or cardboard targets? Cardboard or foam backers? Staple guns and staples? 1” x 2” sticks to staple the targets to or 2” X 4” frames and particle board? How many staple guns grow feet and walk off the range each year? How much time is spent per relay stapling up new paper or cardboard targets? What about high wind and rain? The point is, you can shoot on steel in all kinds of weather, and all you need is a spray can of paint to re-spray the target(s) for the next shooter(s).
I’m going out on a limb here, but I would like to toss out the idea that all in service training for patrol officers can be done on steel and not use a paper or cardboard target at all. I’m even going to take the idea further and say that qualification can be shot on steel. If you are like most departments, 70 – 80% hits in an acceptable area of the target and the officer passes qualification until the next time. All you have to do is measure the surface area (square inches) of the acceptable target surface on your qualification target and find a steel target that is the same shape and has the same surface area. When firing qualification, each officer firing has a coach (another officer) behind the shooter that has a score sheet of rounds fired at each stage. All the scoring officer has to do is count the number of hits and record the number of misses at each stage. At the end of the course, tally up the misses, multiply by your factor (50 rounds, each round worth 2 points, etc.) and you have the qualification score.
Now, I understand that for documentation purposes, some departments are locked into shooting a paper target that can become a part of the officer’s documentation. I’m just saying that after working with problem shooters for over two decades, I’ve had the quickest and best results by giving the “problem” shooter a steel target that was smaller than their qualification target, bringing them up to accuracy and speed on the smaller steel target, and then having them shoot on their qualification target. Every “problem” shooter that I worked with in this fashion had no problem going back to their department and easily passing qualification.
I have no explanation for why this works, other than a famous line from a Mel Gibson movie, “Aim small, miss small”. If your department still uses a qualification target the size of a horse blanket, you’ll always have a certain percentage of shooters who will miss even at the 3 yard line.
To train / shoot on steel safely at CQB distances (less than 10 yards with a handgun), you need two things:
1. High quality, well designed steel targets;
2. Pulverizing ammunition.
At the end of this article I’ve attached the Steel Safety Rules that Bank Miller and I wrote a few years ago. Keep in mind that they were written for conventional ammunition. The most consistent splatter patterns are with FMJ (ball) ammo. A 100 yard standoff safe distance when shooting rifle or shotgun slugs seems excessive, but I personally saw a 5.56 mm jacket come off a steel target and cut a shooter at 47 yards from the target, and know another Range Master that had a similar mishap at 60 yards.
First, the steel:
– At least AR 500 (nobody reputable in the industry uses anything less).
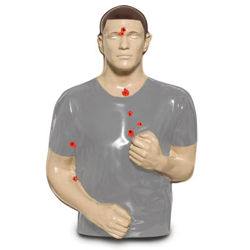
– Completely smooth and flat target surface, free of any dimples, pock marks, etc.. (Dimples and pock marks will turn an incoming round right back at the shooter.)
– No protruding bolts, brackets, etc.. These will cause erratic splatter patterns.
– Target face turned downward at about a 20 degree angle. This will cause about 80% of the splatter to go downward.
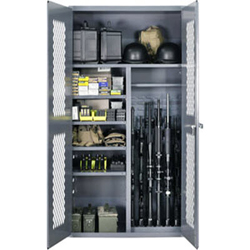
– Targets should be secured at the end of each training session. If not, you-know-who will show up with green and black tip 5.56 mm and there goes a $200 or $300 steel target.
You can read the rest in the Steel Safety Rules at the end of this article. Now I’d like to turn to pulverizing projectiles. Chances are you’ve never heard of the term “pulverizing projectiles” unless you’ve been around myself or Bank Miller. Well, for some time, we have taught in our Range Master class that the term “frangible” is misleading for two reasons:
1. SAMMI, who sets the standards for modern ammunition, has not determined a standard for “frangible”.
2. Even conventional ammunition is frangible if it hits something hard and dense enough. If you shoot a 50 BMG into a granite boulder big enough, the projectile will “frange”. It’s just a question of how big and sharp the “franged” pieces are and how far back they will travel.
Here’s what I mean by “pulverizing projectile”:
1. No jacket! If is has a jacket, the jacket will peel off and come back.
2. When the projectile hits the steel, it completely pulverizes into fine particles like sand, with no pieces larger than a pencil lead, and no broken skin on the shooter or the people standing to the left and right of the shooter.
Since the days when the SIGARMS Academy was the first totally non-toxic frangible range in the country, Mr. Miller and I have tested all “frangible” ammo that comes into our possession by a stringent protocol. I won’t go into it here, but if you are interested, contact me through Action Target.
Just for clarification, most manufacturers of high quality frangible (pulverizing) ammo manufacture non-toxic variants. That means that there is no lead or other toxic heavy metals in the primer or cartridge. If you are shooting on a “clean” (lead-free) range, this is what you want. But if you are shooting on a conventional range that has had leaded ammo shot on it, you can save some money by purchasing the same ammo with leaded primers.
Here are the Steel Safety Rules:
FIREARMS SAFETY RULES
1. Treat all firearms as though they are loaded.
2. Keep your finger outside the trigger guard until you are on target and have decided to fire.
3. Point the muzzle in a safe direction at all times.
4. Be sure of your target and what is beyond it.
STEEL TARGET SAFETY RULES
1. Always obey the Firearms Safety Rules listed above.
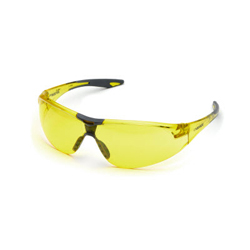
2. Always wear hearing protection and wrap-around shatter resistant eye protection
3. Always stand at least 10 yards from the target when using handgun calibers.
4. Always stand at least 100 yards from the target when using shotgun slugs.
5. Always stand at least 100 yards from the target when using rifle calibers like .223 and .308.
6. Never use rifle calibers on handgun rated targets.
7. Never use ammunition that exceeds 3,000 feet per second at the muzzle.
8. Never use ammunition that travels below 750 feet per second.
9. Never shoot BB’s, steel shot, or air gun pellets at steel targets.
10. Never use more powerful ammunition than the target is rated for. (Green tip, armor piercing, etc.)
11. Never shoot on steel that is cratered, pitted, or damaged in any way.
12. Hard ground surfaces under the target should be covered with plywood or boxed pea gravel.
13. Targets should be placed with a 3 foot lateral and deep offset from the adjacent target.
14. If shooting multiple targets, angle of engagement should not exceed 20 degrees.
15. Use only non-toxic paint on steel targets.
16. Inspect all targets before using for damage, functionality, etc.
17. Shooters and observers must wear long pants (no shorts), long sleeve shirts, a cap or hat with a brim, and closed toed shoes.
18. Instructors and observers should stand behind the shooter and observe all safety rules.
19. If using frangible ammunition, make sure it is designed to disintegrate into powder on impact.
The same velocity rules apply to frangible ammunition as well.
While the basis sounds good, a few problems based on NJ AG guidelines. First for QUALIFICATIONS, a Q target is specified and no deviation is allowed. Secondly, There are phases at ten yards and closer. The guidelines mandate either duty ammo or duty ammo equivalent. The frangible ammo does not meet those requirements.
However, this is an excellent idea for training outside of the actual qualification.
I am the training coordinator for the Department of Veterans Affairs, Office of the Inspector General. I would like to add steel target courses to our firearms training. Where can I get lesson plans for steel target shooting?
Thanks –
Chris
202/461-4521